Hotspots on a 360 spin
This tutorial explains how to add hotspots to your 360 spins.
Hotspots draw attention to particular features of your 360 degree spinning product, such as the 3 features of the pink running shoe below. It has 57 hotspots in total, with messages and tooltips that appear on hover or click. Interact with them to see how they're styled with text, images, videos and links:
How to add hotspots
1. Ask the Sirv support team to enable the hotspot editor in your account. (If you don't have a Sirv account, create one here.)
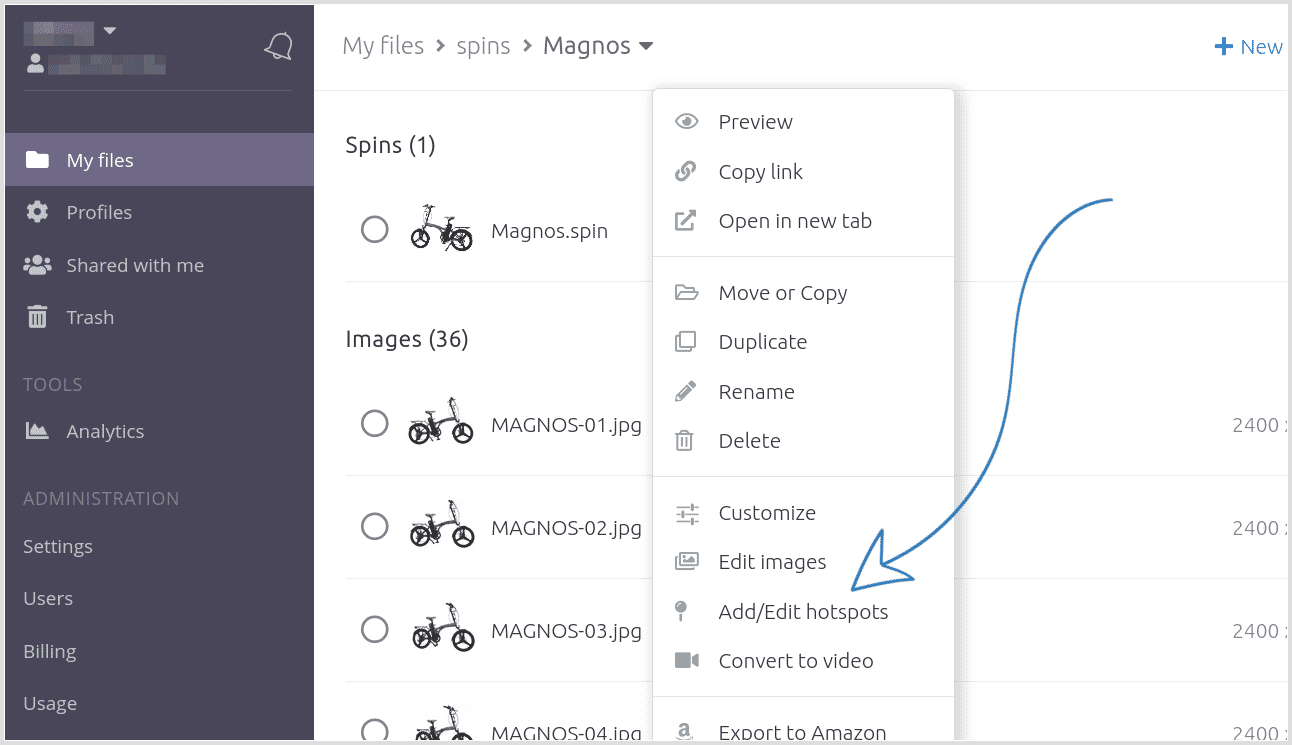
2. Right-click the .spin file in your Sirv account and select "Add/Edit hotspots".
3. Click the spin to place hotspots on 3 frames of your spin, including the first and last frame where you want hotspots to show. The other hotspot locations will be calculated automatically.
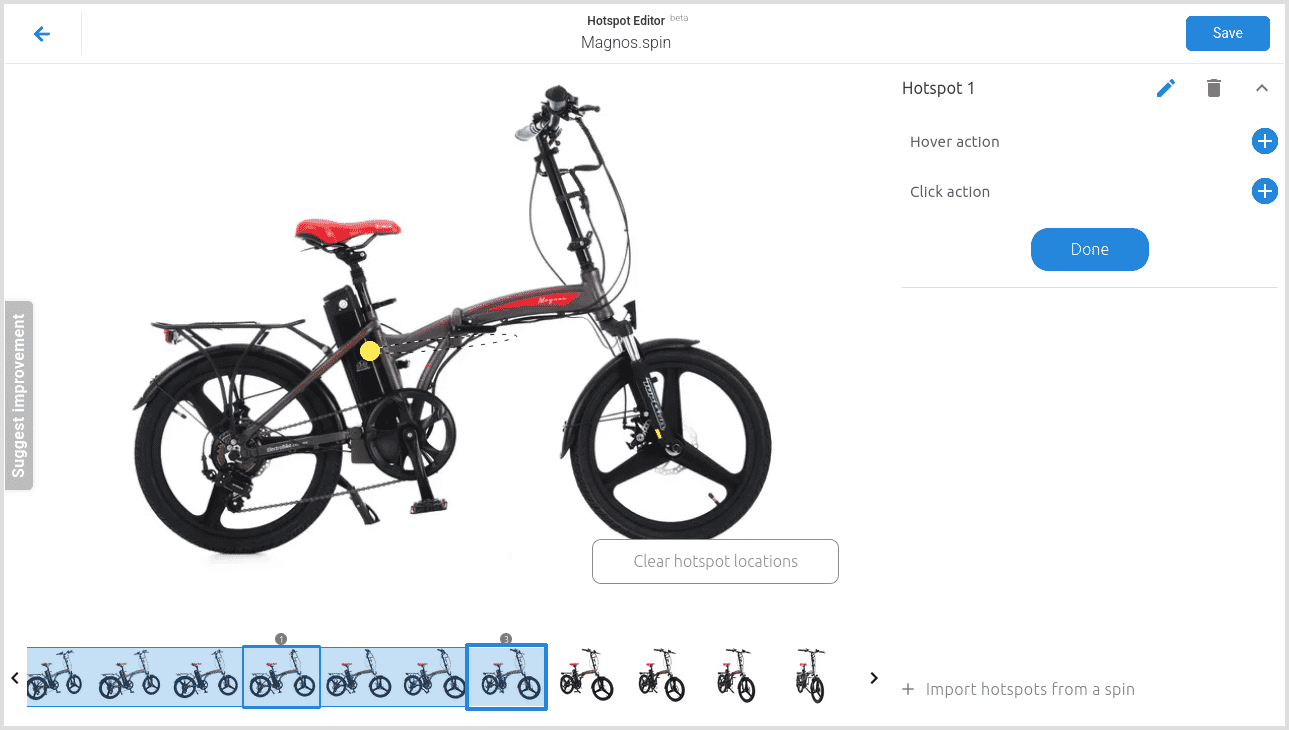
4. Add a message and/or tooltip.
5. Add more sets of hotspots, if you wish.
6. Refine your hotspots until you're happy, then click 'Save'.
7. Open your spin in a new tab to preview it. Or embed it in your web page like so:
<script src="https://scripts.sirv.com/sirvjs/v3/sirv.js"></script>
<div class="Sirv" data-src="https://demo.sirv.com/spins/vivo/vivo-hotspots.spin"></div>
Style your hotspots, messages or tooltips
Use CSS to change the style of your hotspots, messages or tooltips.
Hotspot style
The default hotspot is pulsating and yellow (with pure CSS - no SVG or PNG):
To change the hotspot style, override the default styles by adding your own styles to your HTML page.
For example, the style below will change the color to red (#ff0000):
<style type="text/css" media="screen">
.sirv-hotspot-pointer.pulsating-point::before {
  background-color: #ff0000;
}
.sirv-hotspot-pointer.pulsating-point::after {
  border: 1px solid #ff0000;
}
</style>
The full CSS code for the default yellow hotspot is shown below:
<style type="text/css" media="screen">
.sirv-hotspot-pointer {
  display: inline-block;
  position: absolute;
  width: 20px;
  height: 20px;
  transform: translate(-50%, -50%);
  background-repeat: no-repeat;
  cursor: pointer;
  z-index: 11;
  pointer-events: auto
}

.sirv-hotspot-pointer.pulsating-point {
  background-image: none
}

.sirv-hotspot-pointer.pulsating-point::after,
.sirv-hotspot-pointer.pulsating-point::before {
  display: inline-block;
  position: absolute;
  top: 0;
  left: 0;
  width: 100%;
  height: 100%;
  transform-origin: 50% 50%;
  border-radius: 100%;
  content: ''
}

.sirv-hotspot-pointer.pulsating-point::before {
  transition: opacity .2s ease-in, transform .1s ease-out;
  background-color: #ff0;
  opacity: .6;
  overflow: hidden
}

.sirv-hotspot-pointer.pulsating-point::after {
  border: 1px solid #ff0;
  opacity: 0;
  box-sizing: border-box;
  -webkit-animation: pulsating-point-pulsate 3s ease-out infinite;
  animation: pulsating-point-pulsate 3s ease-out infinite
}

.sirv-hotspot-pointer.pulsating-point:hover::before {
  cursor: pointer;
  opacity: .8
}

.sirv-hotspot-pointer.pulsating-point:active::before {
  transform: scale(.875)
}

.sirv-hotspot-pointer.pulsating-point:hover::after {
  -webkit-animation: none;
  animation: none
}

.sirv-hotspot-pointer.pulsating-point:active::after {
  -webkit-animation: pulsating-point-stop-pulsate .3s;
  animation: pulsating-point-stop-pulsate .3s
}

@-webkit-keyframes pulsating-point-pulsate {
  0% {
    transform: scale(1);
    opacity: .8
  }
  45% {
    transform: scale(1.75);
    opacity: 0
  }
}

@keyframes pulsating-point-pulsate {
  0% {
    transform: scale(1);
    opacity: .8
  }
  45% {
    transform: scale(1.75);
    opacity: 0
  }
}

@-webkit-keyframes pulsating-point-stop-pulsate {
  from {
    opacity: .4
  }
  to {
    transform: scale(2);
    opacity: 0
  }
}

@keyframes pulsating-point-stop-pulsate {
  from {
    opacity: .4
  }
  to {
    transform: scale(2);
    opacity: 0
  }
}
</style>
Tooltip style
Tooltips can be shown on hover. The default style looks like this:
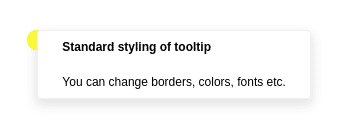
Change the style by adding your own CSS to your web page.
The CSS styles for the default tooltip are shown below:
<style type="text/css" media="screen">
.sirv-hotspot-tooltip {
  display: block;
  position: absolute;
  padding: 8px 24px;
  transition: opacity .15s linear 0s;
  border: 1px solid #efefef;
  border-radius: 4px;
  background-color: #fff;
  font: normal 12px/1.42857 'Lucida Grande', 'Lucida Sans Unicode', Verdana, 'Helvetica Neue', Arial, Helvetica, sans-serif;
  border-collapse: separate;
  box-shadow: 0 5px 10px 2px rgba(0, 0, 0, .1);
  opacity: 0;
  z-index: 9999999999;
  pointer-events: none;
  -webkit-font-smoothing: antialiased
}

.sirv-hotspot-tooltip--default {
  margin-top: -8px;
  padding: 6px 9px;
  transform: translate(-50%, -100%);
  border: 0;
  background-color: rgba(49, 51, 61, .76);
  color: #eee
}

.sirv-hotspot-tooltip--default::after {
  position: absolute;
  top: 100%;
  left: 50%;
  width: 0;
  height: 0;
  transform: translateX(-50%);
  border-width: 8px 8px 0;
  border-style: solid;
  border-color: rgba(49, 51, 61, .76) transparent transparent;
  content: ''
}

.sirv-hotspot-tooltip--balloon {
  margin-top: -40px;
  transform: translate(-40px, -100%)
}

.sirv-hotspot-tooltip--balloon::after {
  position: absolute;
  top: 100%;
  left: 24px;
  width: 0;
  height: 0;
  border-width: 0 15px 40px 0;
  border-style: solid;
  border-color: transparent #fff transparent transparent;
  content: ''
}

.sirv-hotspot-tooltip.sirv-hotspot-tooltip-visible {
  transition-delay: .1s;
  opacity: 1
}
</style>
Message box style
The message box appears on click. The default style looks like this:
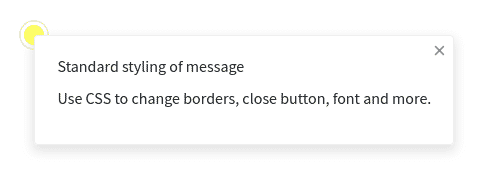
Change the style by adding your own CSS to your web page, to override the default style. For example, this style would set a maximum message box width of 400px:
.sirv-hotspot-box {
  max-width: 400px;
}
The CSS styles for the default message are shown below:
<style type="text/css" media="screen">
.sirv-hotspot-box {
  display: flex;
  position: fixed;
  max-width: 500px;
  max-height: 500px;
  padding: 10px;
  transition: opacity .15s linear 0s;
  z-index: 9999999999;
  box-sizing: border-box
}

.sirv-hotspot-box.sirv-hotspot-box-out-of-width {
  right: 0!important;
  left: 0!important
}

.sirv-hotspot-box.sirv-hotspot-box-out-of-height {
  top: 0!important;
  bottom: 0!important
}

.sirv-hotspot-box .sirv-hotspot-box-wrapper {
  display: flex;
  position: relative;
  max-width: inherit;
  max-height: inherit;
  padding: 22px;
  border: 1px solid #efefef;
  border-radius: 4px;
  background: #fff;
  font-size: 16px!important;
  line-height: 100%;
  text-align: left;
  border-collapse: separate;
  box-shadow: 0 5px 10px 2px rgba(0, 0, 0, .1);
  overflow: hidden;
  box-sizing: border-box
}

.sirv-hotspot-box .sirv-hotspot-box-content {
  top: 0;
  left: 0;
  width: 100%;
  max-width: inherit;
  height: 100%;
  max-height: inherit;
  overflow: auto
}

.sirv-hotspot-box .sirv-hotspot-close-button {
  position: absolute;
  top: 2px;
  right: 2px;
  width: 24px;
  height: 24px;
  color: #888;
  font: normal 22px/1 Arial, monospace;
  text-align: center;
  cursor: pointer;
  speak: none;
  -webkit-font-smoothing: antialiased
}

.sirv-hotspot-box .sirv-hotspot-close-button::before {
  display: inline;
  position: static;
  color: inherit!important;
  font: inherit!important;
  content: '×';
  vertical-align: middle;
  -webkit-font-smoothing: inherit!important
}
</style>
Custom styles
Instead of customizing the default style, you can create new styles. The name of your new style should be referenced in the .spin file. You can also apply different styles to different hotspots.
To apply a custom style:
1. Create a new CSS class in your stylesheet or HTML page. The following example has a class named t-ball which will show a tennis ball image as the spot:
<style>
.sirv-hotspot-pointer.t-ball {
    width: 20px;
    height: 20px;
    background-image: url(https://demo.sirv.com/demo/tennis-ball.png?w=40);
    background-size: 100%;
    border-radius: 50%;
}
</style>
2. Apply that style to a hotspot in the .spin file. This is a text file in JSON format:
  "hotspots": [
    {
    "style": "t-ball",
Here's more context of where the style is referenced in a .spin file:
    "hotspots": [
      {
        "style": "t-ball",
        "tooltip": {
          "content": "<h3>Click to view</h3>",
          "style": "balloon"
        },
        "box": {
          "content": "<div><h3>Example</h3><br><br>This is a test.</div>",
          "x": "center",
          "y": "top",
          "fixed": true
        },
        "frames": {
          "1": {
            "pointer": {
              "x": "55%",
              "y": "19%"
            }
          },
          "2": {
            "pointer": {
              "x": "53%",
              .... and so on
Fullscreen message box
The following example will scale the width/height of the message box to fill the viewport (fullscreen). It uses a custom class named sirv-messagebox-custom. It also removes the internal padding in the message box and increases the size of the close button:
.sirv-messagebox-custom {
  position: fixed !important;
  inset: 0 !important;
  padding: 0 !important;
}
.sirv-messagebox-custom iframe {
  width: 100vw;
  height: 100vh;
}
.sirv-messagebox-custom .sirv-hotspot-box-wrapper {
  padding: 0;
}
.sirv-messagebox-custom .sirv-hotspot-close-button {
  top: 0;
  right: 0;
  width: 66px;
  height: 66px;
  font-size: 58px;
}
To apply that class to a hotspot, add the style name to the appropriate hotspot inside the .spin file.
  "hotspots": [
    {
    "style": "sirv-messagebox-custom",
Use HTML in message box
You can use HTML in hotspot messages and tooltips. Most HTML markup is supported including images, video, audio, buttons, iframes, spans, headings and lists. All " characters should be escaped with a leading \ like this: \". The hotspot configuration wizard will automatically escape characters for you.
Change message box location
Message boxes can be positioned anywhere on your spin. By default, they're located to the right of the hotspot. Use the x and y coordinates to move them up/down/left/right, either in % or px. The position can be relative to the hotspot or a fixed position relative to the top left corner of the spin. Values can be positive or negative (to move the box left or up).
Hotspots API
The Hotspots API lets you dynamically control hotspots on a spin or image.
Use .hotspots to access the Hotspots API. You can target a particular viewer instance on the page (in case there are multiple viewers) by referencing its id. The example below targets a viewer with the id of smv:
Sirv.getInstance('#smv').child(0).spin.hotspots.enable(0);
The available Hotspots API parameters are as follows:
| Method | Parameters | Description |
|---|---|---|
| .add(hotspotSettings) | hotspotSettings (JSON | Array<JSON>) | Add hotspot(s) and settings |
| .remove(index) | index (number) | Remove one hotspot |
| .removeAll() | Remove all hotspots | |
| .enable(index) | index (number) | Enable a particular hotspot |
| .disable(index) | index (number) | Disable a particular hotspot |
| .list() | List all hotspots | |
| .setVisibility(index) | index (number) | Show/hide message popup or tooltip |
Example to set hotspot visibility:
Sirv.getInstance('#smv').child(0)
 .spin.hotspots.setVisibility(0, {
   popup: 1,  // 1 - always visible, 0 - default behavior
   tooltip: 1,
  });
You can set visibility for either the message popup or the tooltip or both at the same time. This shows just the popup:
Sirv.getInstance('#smv').child(0)
 .spin.hotspots.setVisibility(0, {
   popup: 1
  });
Hotspot code
Hotspots are saved in JSON format, so it's possible to create your own hotspot wizard if you're building a mobile or web app.
View the hotspot code by appending ?info to any .spin file URL. You'll see the hotspot code, which looks similar to this:
  "hotspots": [{
      "box": {
        "content": "Your hotspot message here.",
        "fixed": true,
        "x": "50",
        "y": "50"
      },
      "frames": {
        "3": {
          "pointer": {
            "x": "69.16%",
            "y": "59.58%"
          }
        },
        "4": {
          "pointer": {
            "x": "65.35%",
            "y": "60.94%"
          }
        }
      }
    },
    {
      "tooltip": {
        "content": "This is a tooltip<br/>n<br/>nClick to see the message."
      },
      "box": {
        "content": "<h3>This is a message</h3><br/>nMessages can contain HTML, such as <a href="https://example.com/" target="_blank">links</a> and images:<br/>n<br/>n<img src="https://demo.sirv.com/example.jpg?w=260">"
      },
      "frames": {
        "14": {
          "pointer": {
            "x": "86.4%",
            "y": "46.89%"
          }
        },
        "15": {
          "pointer": {
            "x": "82.17%",
            "y": "50%"
          }
        },
        "16": {
          "pointer": {
            "x": "76.33%",
            "y": "52.63%"
          }
        }
      }
    }
  ]
That code will add 2 hotspots: one shown on 3 frames, with a popup message and a tooltip; the other with a popup message only, shown on 2 frames.
HTML page in a message
It is possible to show a separate web page within a hotspot message, using an iframe.
Add this JavaScript function to your page:
function adjustHotspotBoxSize(iframe) {
  try {
    const {width, height} = document.querySelector('.smv .smv-slide.smv-shown .sirv-hotspot-container')?.getBoundingClientRect();
    iframe.width = width - 44;
    iframe.height = height - 44;
  } catch {}
}
Add this CSS to your page:
.sirv-hotspot-box {
  padding: 0;
}
.sirv-hotspot-box .sirv-hotspot-box-wrapper {
  border: 0;
}
.sirv-hotspot-box .sirv-hotspot-box-content {
  height: 100%;
}
.sirv-hotspot-box-content > iframe {
  border: 0;
}
Configure your hotspot message box with these settings - change the web page URL to your desired URL:
"box": {
  "content": "<iframe src="https://en.wikipedia.org/" onload="adjustHotspotBoxSize(this)"></iframe>",
  "fixed": true,
  "x": 0,
  "y": 0
},
Hotspots on multi-row spin
It is also possible to add hotspots to multiple row spins, by referencing the frame number.
For example, if your spin has 3 rows of 24 images, the first frame of row 1 will be 1 and the last will be 24. The first frame of row 2 will be 25 and the last will be 48. The first frame of row 3 will be 49 and the last will be 72.
Summary
This tutorial describes how to add hotspots to your 360 spin images.
Our team is constantly improving the hotspot wizard. We'd be thrilled if you would send your feedback and requests, to help us continue improving the wizard to meet your needs.