How to edit 360 spins in Photoshop
![]()
To display the best possible 360° product photography, you need to touch up your images after shooting them. Photoshop is one good option. It is particularly effective at creating the pure white background which many retailers want behind their 360 spins. Compare these two spins:
BEFORE
AFTER
Photoshop is also an excellent program for cropping, sharpening and adjusting color. By recording an 'action', you can bulk edit all your images within minutes. This step-by-step guide shows you how.
Watch the tutorial
This 3 minute video by Seabass walks you through creating a Photoshop action for your 360 spin images:
Step-by-step guide
This step-by-step guide on using Photoshop for 360-degree spins will give your product views a truly white background.
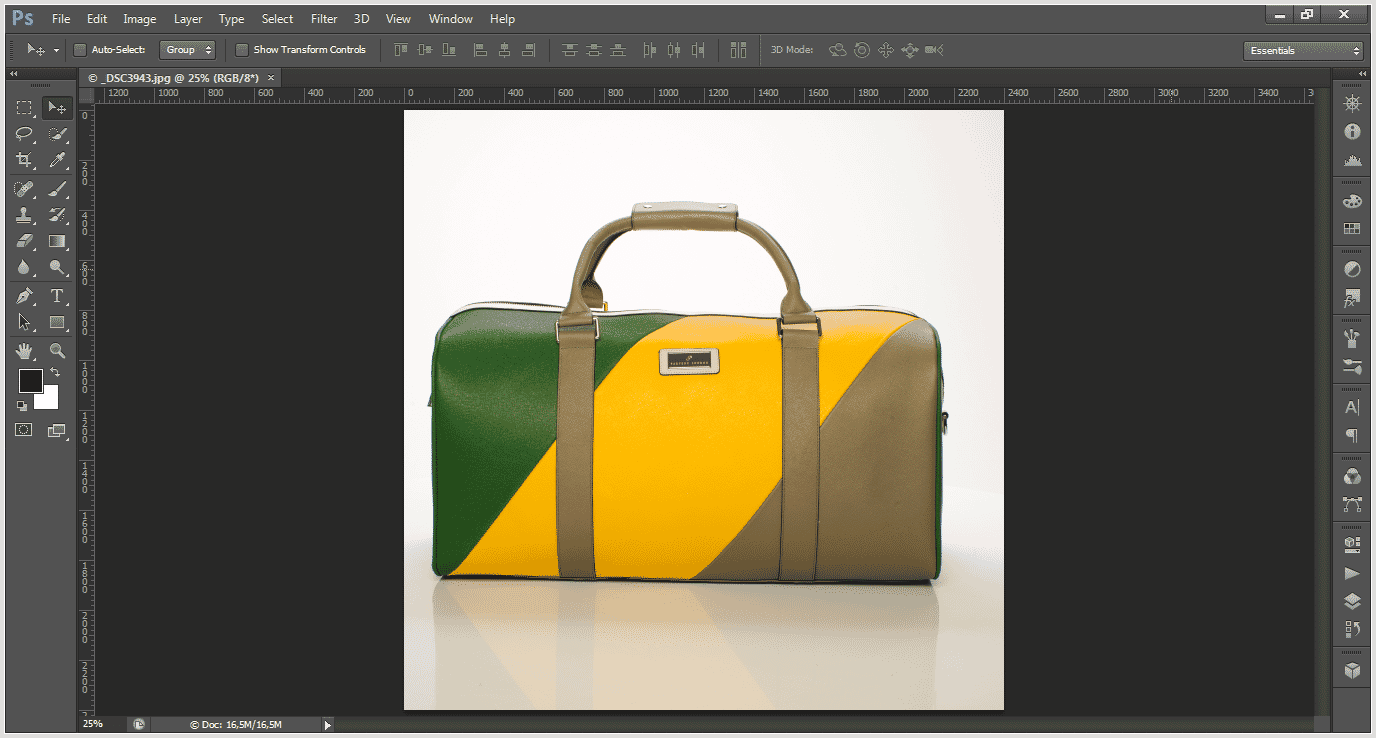
1. Open one of your spin images in Photoshop (press Ctrl+O on Windows or Command+O for Mac). Choose an image that shows your product from the side - this will help avoid over-cropping some of your images. For example:
2. Choose 'New action' like so:
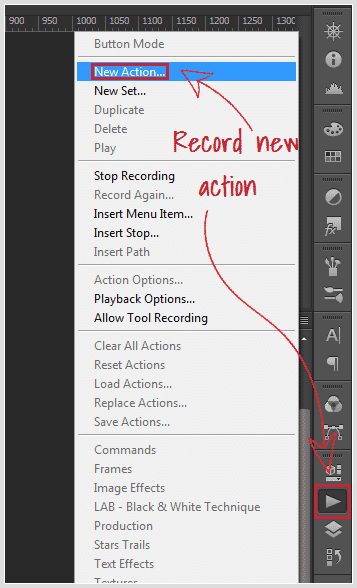
By recording your edits on a single image, you can apply them to all the other images later.
3. Crop the image, leaving some white space on the right, left, top and bottom. The product should be fully seen when spinning.
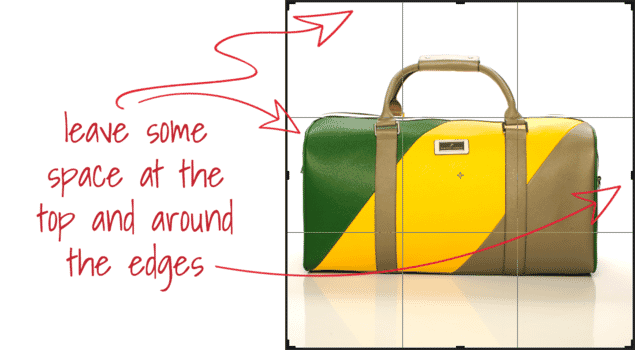
Press Enter when done.
4. Open the Levels tool (Ctrl+L on Windows or Command+L on Mac), like so:
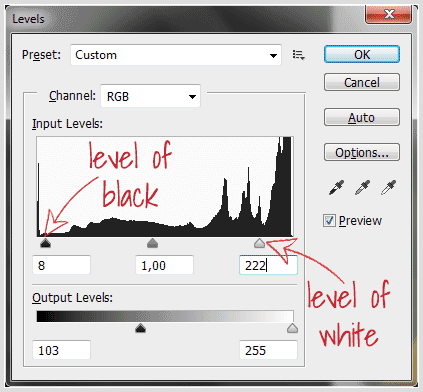
Adjust the level of white to achieve a truly white background (hold Alt for Windows or Option for Mac to see the problem zones). Change the level of black to add contrast.
You might also want to adjust color (use Ctrl+U for Windows or Command+U for Mac), apply sharpening or make other refinements.
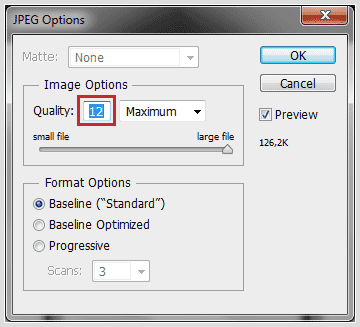
5. After applying your changes, save the image into a new folder (so your original images are not overwritten). To maintain the greatest detail, we recommend saving at maximum quality (12), though you could reduce it to 11 with minimal loss of detail:
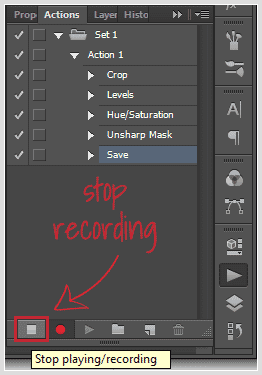
6. After saving the image, stop recording like so:
Close the window with the image.
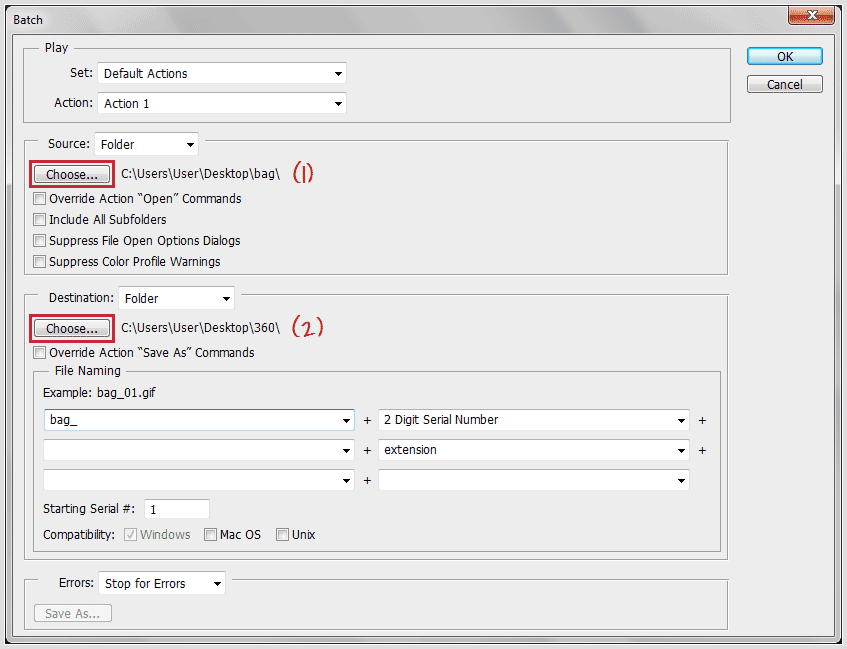
7. Apply the same changes to the other images with File -> Automate -> Batch.
Choose the source folder for your images (1) and the destination folder where they should be saved (2):
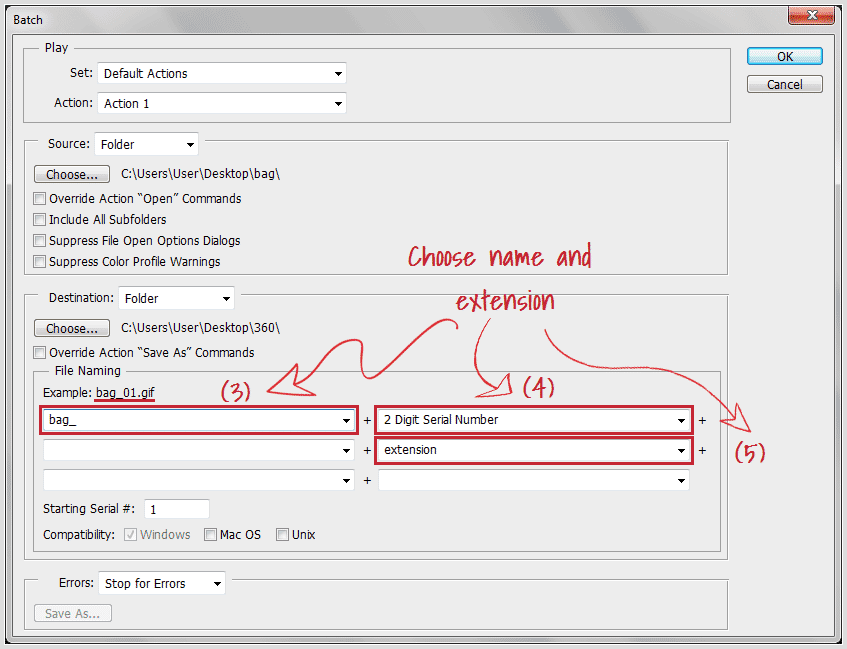
8. Choose the name of the final product (3). In the example below, it's "bag_". Add an underscore or hyphen to separate the name and the 2 digit serial number.
Choose the number of digits you prefer. Typically, 2 digits are used if your spin has fewer than 100 images and 3 digits if it has more than 100 images.
Choose the extension - typically .jpg or .png (5).
Processing can take a short while, depending on the speed of your computer and the number of images.
8. Login to your Sirv account and upload your pictures.
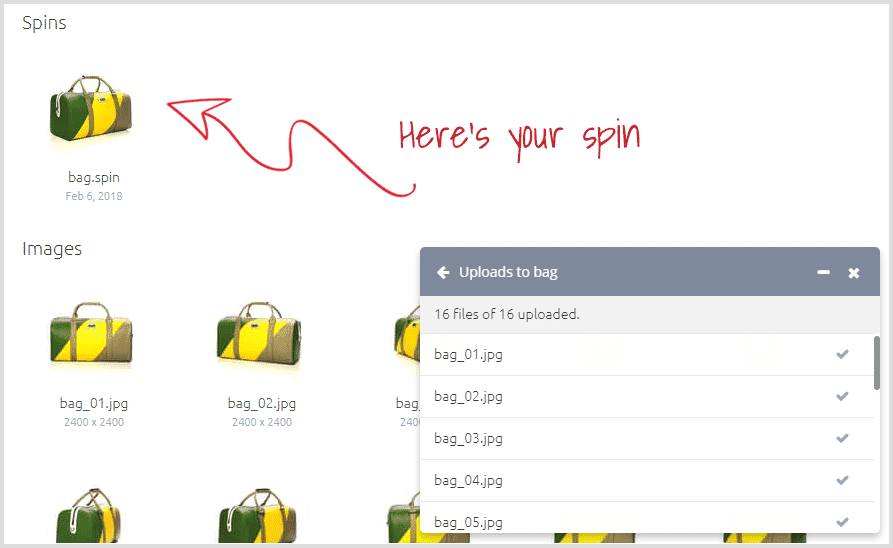
Click the spin to preview it. Embed the spin on your website or share it in social media.
Try it now
Start using Sirv today - create your free account. Use Photoshop for 360 product photography editing, to discover how easily you can add stunning 360 spins to your website.