Sync a local folder to Sirv via FTP
It's easy to automatically upload files from a local folder to your Sirv account, via FTP. Follow the instructions below.
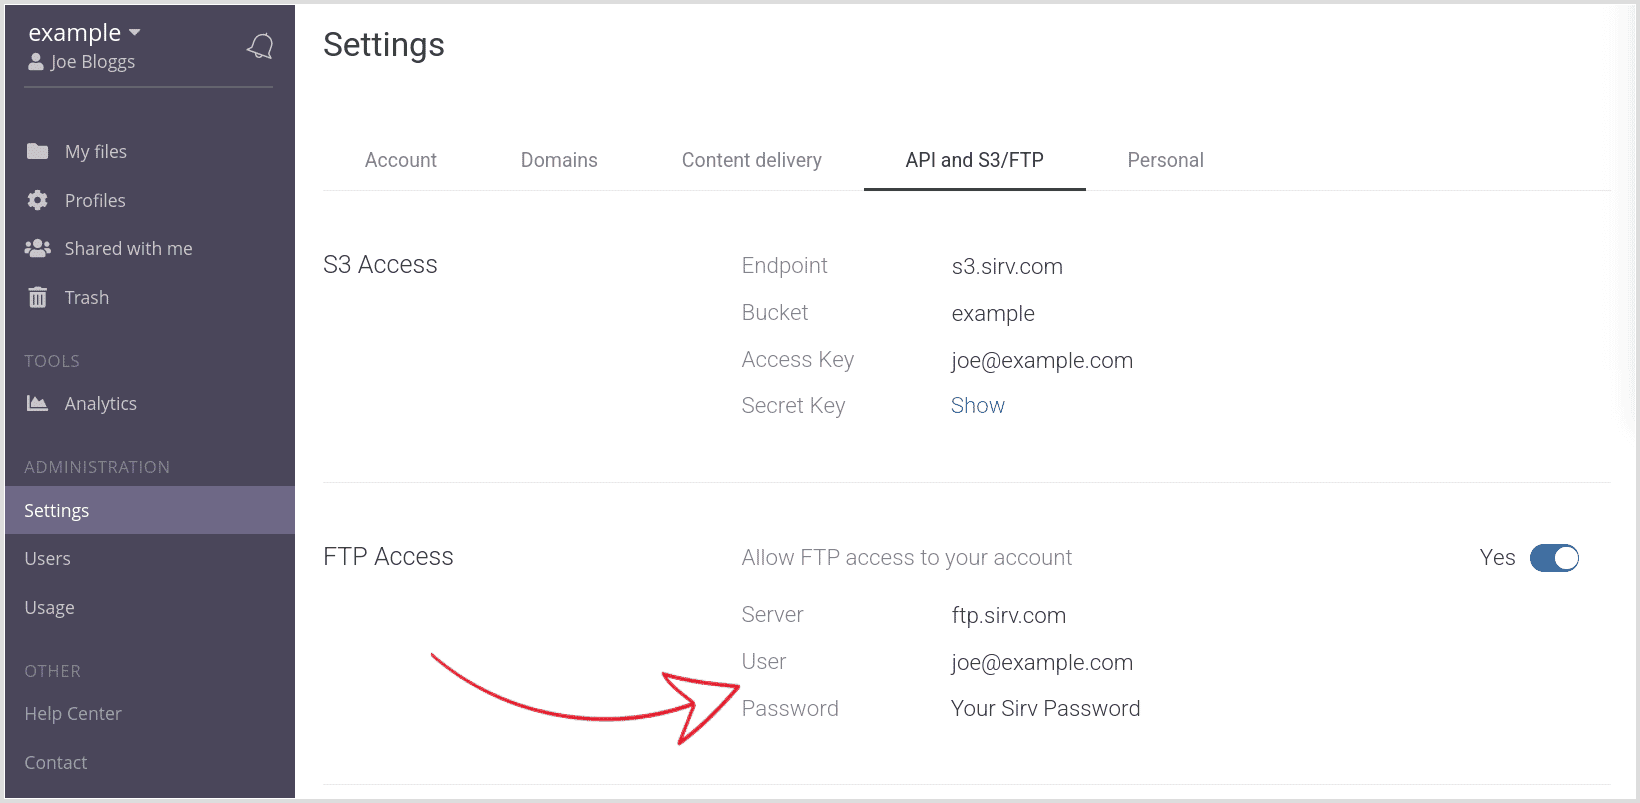
Get your FTP credentials
First, get your FTP login details from your Sirv settings page. If your user belongs to multiple accounts, make sure not to omit the "+account" part from the login.
Then follow the instructions below, depending on whether you use Windows, Linux or Mac.
Sync files from Windows
1. Get WinSCP
WinSCP (download) is a powerful free program that can sync local folders via FTP. To sync your local folder with Sirv, open WinSCP and follow these steps:
2. Connect to FTP
After launching WinSCP, you'll be greeted with the login screen:
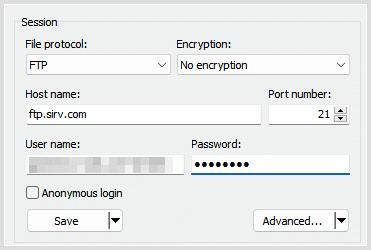
Enter your credentials from Sirv settings. Set the file protocol to FTP, encryption to 'no encryption' and port to 21.
Save your session for future convenience.
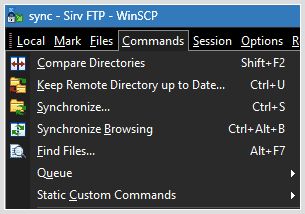
3. Open the remote directory sync tool
Click "Commands" > "Keep remote directory up to date".
4. Start syncing
Select the local folder and the folder in your Sirv account. You can open your local folder on the left pane of WinSCP and your remote folder on the right pane, these settings will be automatically populated.
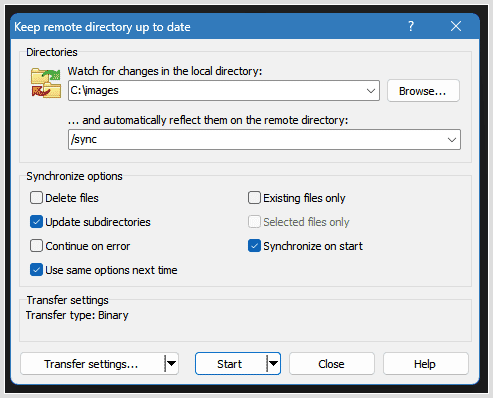
If you'd like to mirror your local folder to your Sirv folder, click the 'Delete files' checkbox. This will delete files from Sirv, if they've been deleted from your local folder.
Sync will start immediately and should keep running until you restart Windows.
Minimize the window to the system tray, to keep it out of the way.
Delete or move file after upload
Once a file has been uploaded, most Sirv users want to either delete the local file or move it to another folder for long term local storage. This can be done with a WinSCP script. Documentation is here:
If you're not proficient in scripting, but would like to implement this workflow, follow these steps:
- Open WinSCP and connect to Sirv FTP.
- On the right pane, go to the desired sync folder.
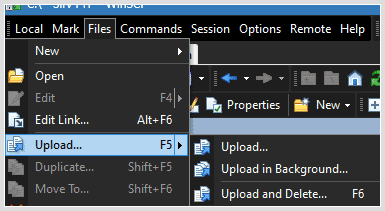
- On the left pane, select the folder and click Files > Upload > Upload and Delete:
![WinSCP screenshot, upload and delete files]()
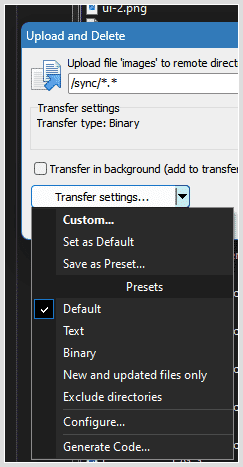
- In Transfer settings, click Generate Code:
![WinSCP screenshot, generate code]()
- Copy the script and save it somewhere as a .txt file. It'll look similar to this:
open ftp://yourname%40yourdomain.com%2Btesting:yourpassword@ftp.sirv.com/

lcd C:\
cd /sync

put -delete YourLocalFolder\*

exit

# Execute the script using a command like:
# "C:\Program Files (x86)\WinSCP\WinSCP.exe" /log="C:\logs\WinSCP.log" /ini=nul /script="C:\Users\david\Desktop\sirvsync.txt"
To prevent WinSCP from deleting the source folder, add a backslash with an asterisk to the end of line 4. For example, change this:
put -delete YourlocalFolder
to this:
put -delete YourlocalFolder\*
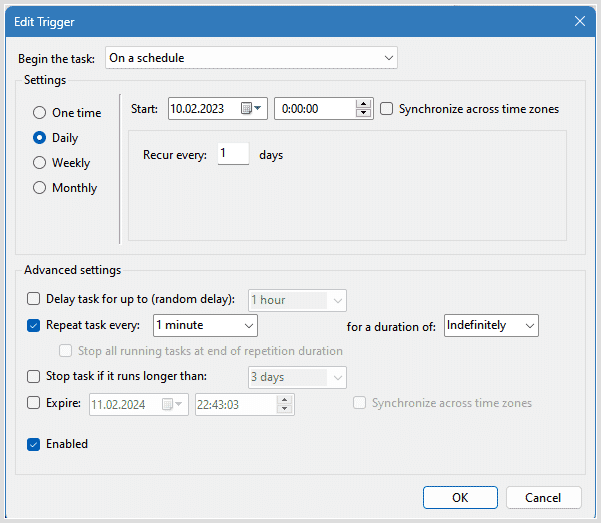
- Open Windows Task Scheduler and create a new task. Configure the scheduling trigger however you wish:
![WinSCP screenshot, edit trigger]()
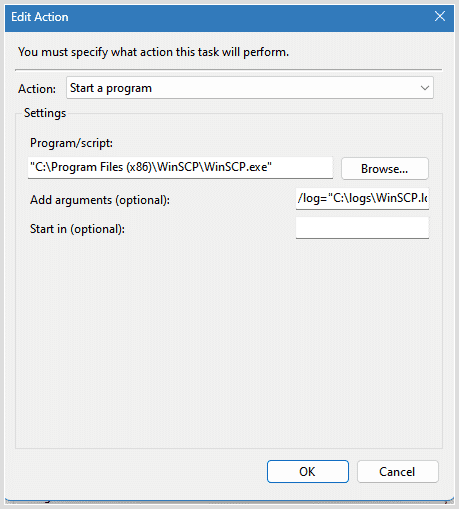
- In the Actions section, choose "Start Program" and enter the path to your WinSCP execution file. Usually, it is: "C:\Program Files (x86)\WinSCP\WinSCP.exe". In the Arguments section, add the location of your log file (you need to create it beforehand), for example: /log="C:\logs\WinSCP.log" followed by /ini=nul and the location of your script file, for example: /script="C:\Users\david\Desktop\sirvsync.txt".
The full line will look something like this:
/log="C:\logs\WinSCP.log" /ini=nul /script="C:\Users\david\Desktop\sirvsync.txt"
- Save your changes and you've finished:
![WinSCP screenshot, run program]()
Sync files from macOS/Linux
Syncing a local folder to Sirv via FTP can be done either with CyberDuck or a simple script that uses the tool called LFTP.
1. Get LFTP
Use your system's package manager to install LFTP.
To install LFTP on Ubuntu, use this command:
sudo apt install lftp
To install LFTP on macOS, you can use Homebrew:
brew install lftp
2. Create the script
Create a file named sync.sh with the following contents:
#!/bin/bash
HOST='ftp.sirv.com'
USER='YourUsernameHere'
PASS='YourPasswordHere'
TARGETFOLDER='/Your-Remote/Folder/Here'
SOURCEFOLDER='/home/user/localfolder'

lftp -f "
open $HOST
user $USER $PASS
lcd $SOURCEFOLDER
mirror -R --scan-all-first --only-newer --verbose $SOURCEFOLDER $TARGETFOLDER --no-perms
bye
"
3. Configure the script
Change these parameters in the script file:
- YourUsernameHere - your username from your settings page
- YourPasswordHere - the password you use to login to Sirv
- /Your-Remote/Folder/Here - path to the folder in your Sirv account
- /home/user/localfolder - path to your local folder
LFTP's mirror has plenty of options that allow you to delete source files (--Remove-source-dirs), upload only newer files (--only-newer) and many more (full list of LFTP options).
4. Make it executable
Make the script executable, like so:
chmod +x sync.sh
5. Test the script
Run the script, to check if it's working:
./sync.sh
6. Schedule script execution
Scheduling the script can be done via Crontab.
If you're not familiar with Crontab expressions, you can generate the command with Crontab Generator, then run crontab -e and paste your expression at the end of the file.
Here's an example:
*/5 * * * * /home/user/sync.sh >/dev/null 2>&1
This will run your script every 5 minutes. Make sure to set the correct path to the sync.sh file.
Get support
If you need any help, please contact the Sirv support team.