Configure Cloudflare CNAME for Sirv custom domain
On this page
![]() CloudFlare is a popular security and CDN service, often used in conjunction with Sirv CDN. If you manage your domain with CloudFlare, it's easy to create a personalized sub-domain for your Sirv account, via a CNAME record.
CloudFlare is a popular security and CDN service, often used in conjunction with Sirv CDN. If you manage your domain with CloudFlare, it's easy to create a personalized sub-domain for your Sirv account, via a CNAME record.
Configure your CNAME via CloudFlare
- Log in to your CloudFlare account.
- Select your domain from the dropdown menu in the top left.
- Select the DNS tab.
![Select the DNS settings tab]()
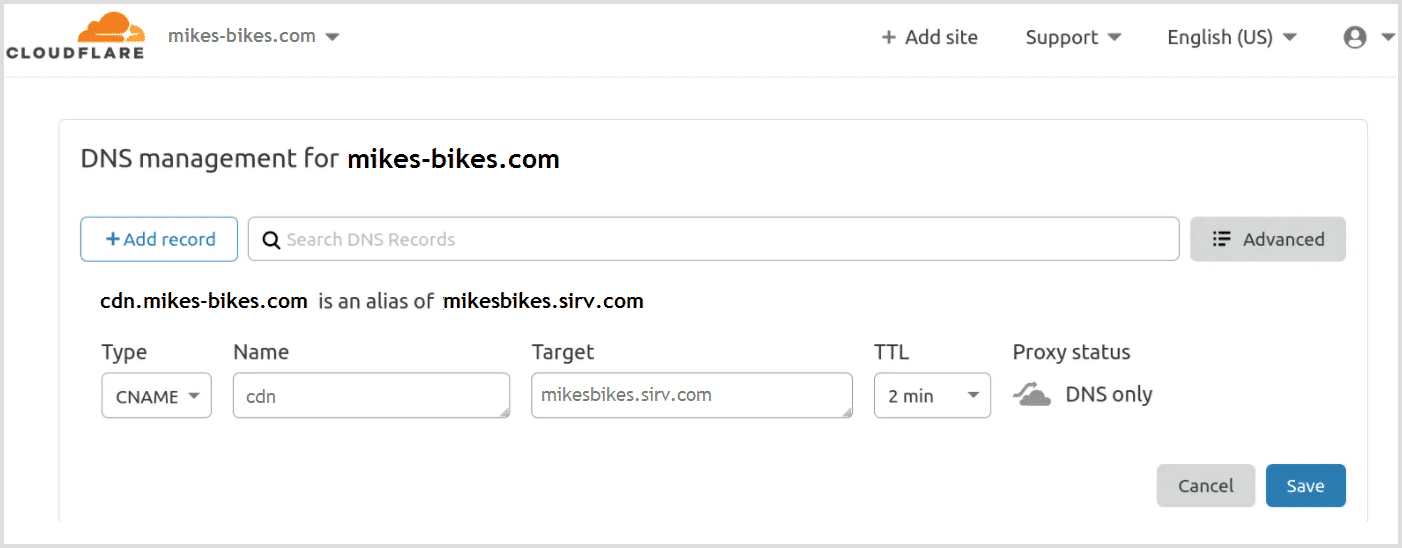
- Create a CNAME record pointing to your Sirv domain. For example, if your Sirv account name is mikesbikes and you want to serve files from cdn.mike-bikes.com, the CNAME should be cdn and the target should be mikesbikes.sirv.com, like this:
![Add the CNAME record]()
- Set the Proxy Status to DNS Only. Toggle the CloudFlare proxy off (click on the cloud icon to make it grey) to ensure the CNAME record for the custom domain is set up correctly.
![Set the Proxy Status to DNS Only]()
CloudFlare does not proxy third-party domains, only your own domain. If mikesbikes.sirv.com is proxied by CloudFlare and the website uses images served by mikesbikes.sirv.com (a third-party CDN), the request to cdn.mike-bikes.com would not be proxied. The grey cloud icon ensures traffic for the DNS record is not proxied, but it is still served by CloudFlare.


Ask an expert
If you need help configuring a CNAME record in CloudFlare, contact our support team. If you don't have a Sirv account yet, create a free account now.